How Much Does It Cost to Tape and Mud Drywall?
Last Updated on April 9, 2024
Written by CPA Alec Pow | Content Reviewed by ![]() CFA Alexander Popinker
CFA Alexander Popinker
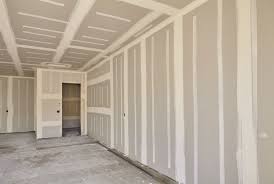
Drywall installation transforms the wooden framework of walls and ceilings into smooth, durable surfaces ready for interior finishes and trimwork. However, the process doesn’t end with just screwing the panels in place.
Proper finishing work is crucial for concealment of seams between panels and achieving an aesthetic, paint-ready result. Two vital steps in drywall finishing are taping and mudding the joints. But what exactly do these processes entail and how much should you expect to budget for them on your next drywall project?
The costs for taping and mudding can range widely based on the precise size of the job, necessary materials, and whether you take a DIY approach or hire professional drywall contractors. Variables like wall height, the number of seams and corners, and the desired quality level also impact pricing.
This article will delve into every aspect of estimating drywall taping and mudding costs. We’ll look at what’s involved, factors affecting pricing, cost-saving tips, when to use pros versus DIY, and how to achieve flawless results that stand the test of time.
How Much Does It Cost to Tape and Mud Drywall?
The cost to tape and mud drywall ranges from $0.30 to $0.80 per square foot for do-it-yourself projects, including materials and labor. For professional services, the cost typically ranges from $0.90 to $1.50 or more per square foot, factoring in higher labor rates and material markup.
The typical price per square foot for materials and labor to complete drywall taping and mudding falls within these ranges:
DIY Taping and Mudding Costs:
- Materials: $0.10 – $0.25 per square foot
- Labor: $0.20 – $0.55 per square foot
- Total: $0.30 – $0.80 per square foot
This assumes the DIYer purchases or rents tools along with necessary supplies like mud, tape, knives, sandpaper, etc. It also accounts for the considerable time investment to gain experience and the learning curve on proper technique.
Professional Taping and Mudding Costs:
- Materials: $0.30 – $0.50 per square foot
- Labor: $0.60 – $1.00+ per square foot
- Total: $0.90 – $1.50+ per square foot
Skilled professionals work far faster and achieve better seamlessness. However, their labor rates are often $40-$70 per hour or more based on local markets and demand. Their material costs also mark up over DIY retail prices.
Cost Comparison for 1000 sq ft Room:
DIY Approach
- Materials: $100 – $250
- Labor: $200 – $550
- Total Cost: $300 – $800
Professional Tapers
- Materials: $300 – $500
- Labor: $600 – $1000
- Total Cost: $900 – $1500
The size and specifics of the job impact precise costs. But this illustrates how DIY leads to major labor cost savings yet involves a substantial time investment. Professionals’ expertise cuts overall project time significantly.
Reddit mentions that the cost to tape and mud drywall for a 22′ x 13′ living room with 8′ ceilings is estimated to be $1,200 to $1,500 for labor only, assuming clean framing to hang on. The cost for board and finishing supplies is estimated to be around $400.
Homewyse reports that the cost to tape drywall joints in January 2024 starts at $1.10 to $1.33 per linear foot. The cost includes labor for taping drywall joints, covering joints and screw heads with mud, embedding tape in joint mud, lightly sanding and re-mudding joints twice, final sanding for primer/finish ready, planning, equipment and material acquisition, area preparation and protection, setup and cleanup.
HomeGuide mentions that the cost to tape, mud, and finish drywall is around $1,000 to $3,000, depending on the size of the room and the required finish level.
HomeDrywallAndConstruction.com mentions that labor costs for taping and mudding drywall are typically between $1.00 and $2.50 per square foot, depending on the required finish level.
RealEstimateService.com mentions that the national average materials cost to tape drywall joints is $0.05 per linear foot, with a range between $0.04 to $0.05. The total price for labor and materials per linear foot is $0.91, coming in between $0.83 to $1.00.
Drywall Taping and Mudding Explained
Drywall taping and mudding refers to two important finishing steps:
Taping – Specialized drywall joint tape is embedded into a thin layer of mud over every seam and interior corner. The strong, adhesive tape bonds to the joint compound and creates a continuous span over the gaps between each panel. This prevents cracks from developing along seams down the road as building materials shift and settle over time.
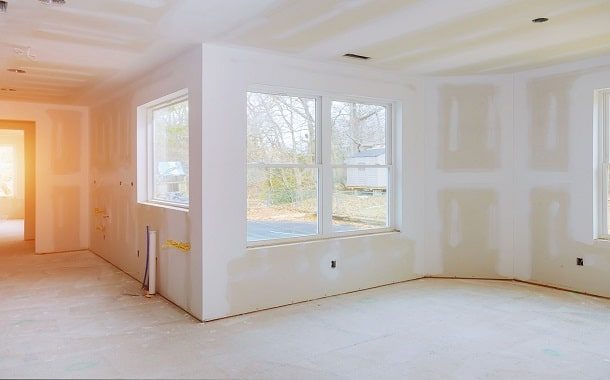
Mudding – Also referred to as “floating”, mudding involves spreading dried joint compound smoothly and seamlessly over every taped seam, corner, and fastener depression using broad drywall knives. The goal is to completely conceal any sign of the seams, achieving one monolithic surface ready for decoration. Multiple thin coats of mud feathered out widely are used to prevent sudden ridges and unevenness.
Mudding also serves to fix other flaws like popped nail heads, cracks, irregular textures, and previously repaired areas in existing drywall. Proper technique results in walls and ceilings that look as if they were constructed entirely from one solid piece, with no visible seams even under close inspection.
Tools and Materials Needed
Successfully executing taping and mudding requires having the proper tools and materials on hand, including:
- Joint compound or drywall mud – Available as powder mixes and convenient pre-mixed formulations. All-purpose mud works for taping and finish coats.
- Drywall tape – Special self-adhering paper or fiberglass mesh tape formulated for embedding into joint compound.
- Putty knives and trowels – Available in sizes from 4 to 14 inches for handling different tasks and areas.
- Mud trays and buckets – For holding compound while working. Disposable trays minimize cleanup.
- Mud mixer – Helps achieve a smooth, lump-free consistency ideal for application.
- Pole sander – Enables sanding high walls from the floor to smooth mud coats.
- Sandpaper – Assorted grits like 150 and 220 for smoothing between coats.
- Mud pan – Panel lifters, work lights, safety gear, and other tools also come in handy for efficient, safe finishing.
Factors That Impact Taping and Mudding Costs
Several variables affect the costs incurred for taping and mudding, including:
Size of the Drywall Job – Larger houses or commercial spaces with expansive ceiling and wall square footage demand more materials and longer labor hours, increasing overall project pricing.
Wall Heights and Room Dimensions – Properties with cathedral ceilings, high interior walls over 20 feet tall, or cramped spaces require equipment like scaffolding, lifts or specialty tools that add to costs.
Number of Seams and Corners – The total length of every seam and interior corner that needs taping and floating adds up in time and tape/mud required. More complex room layouts add more joints to finish.
Level of Finish Quality Desired – A smooth “Level 5” finish takes more coats of joint compound and gradual sanding between each to conceal seams and texture variances completely.
Geographic Location of the Project – In areas where skilled trade wages run higher, the professional labor costs to tape and mud increase proportionally. Materials pricing also varies regionally.
You might also like our articles about the cost to replace galvanized pipes, install hardwood stairs, and add Tamko shingles.
Type of Joint Compound Used – While slower drying, lightweight finishing muds create the most seamless results, they cost more than fast-set joint compounds. But using the right materials for each coat saves rework.
Pros and Cons of DIY vs Professional
Is it worth taking on taping and mudding as a DIY project or preferable to hire a professional crew? Here are some considerations:
Benefits of DIY Taping and Mudding
- Substantially lower costs by avoiding labor fees
- Sense of personal accomplishment and learning new skills
- More flexibility in project schedule and pace
Downsides of DIY Taping and Mudding
- Very time consuming and physically demanding work
- Achieving a consistently smooth, seamless finish takes experience and finesse
- Handling high ceiling and wall areas requires rented equipment like scaffolding and drywall lifts
Benefits of Hiring Professional Tapers
- Significantly faster project completion, especially on large jobs
- Superior results and finish quality in the hands of specialists
- Access to specialized tools, lifts and techniques for high walls and tricky scenarios
Tradeoffs of Hiring Taping and Mudding Crews
- Added cost for skilled labor, potentially thousands for large homes
- Coordinating work schedules with contractors
For most homeowners lacking drywall experience, hiring pros to tape and mud is worth the investment in quality results and avoiding DIY frustrations. But with practice, smaller jobs can be rewarding.
Step-by-Step Guide to Taping and Mudding
Follow these key steps for smooth results:
- Inspect and repair flaws in drywall surface
- Mix drywall mud to a smooth, toothpaste-like consistency
- Apply tape over the seams and embed them into a thin mud layer. Smooth gently.
- Let tape coats dry completely, then apply second coat, extending 8-12 inches beyond first coat. Feather the edges smooth.
- Sand gently when dry. Fill in any visible imperfections.
- Apply a third coat, feathering out even wider for a seamless look. Lightly sand again when dry.
- Carefully inspect surface and touch up any visible seams, nails, or flaws with final skim coat of mud.
- Final sanding for smooth finish. Prime and paint.
Allow thorough drying between coats. Rushing the process risks cracks later.
Cost-Saving Tips
 Savvy strategies for keeping costs down on your drywall finishing include:
- Buying joint compound in bulk bags or 5 gallon buckets to take advantage of volume pricing on mud. Just mix as needed.
- Renting specialized tools like scaffolding and lifts for tall ceilings rather than buying equipment you’ll rarely use again.
- Checking DIY blogs and videos for taping and mudding technique guidance and tips to reduce frustration and avoid amateur mistakes on your first try.
- Carefully inspecting joints and ensuring tapes are fully embedded to prevent bonding issues that require expensive re-taping later.
- Purchasing quality joint tapes formulated for good adhesion and resistance to cracking. Don’t cut costs here.
- Using lightweight, high-flexibility finishing mud for final coats to best conceal seams and create smooth results despite added costs over heavy, quick-set muds. Finishing well the first time saves future repairs.
Final Words
Drywall finishing transforms the installed panels into gorgeous, durable surfaces ready for interior design. While taping and mudding the seams involves tedious work, proper techniques result in flawless, enduring results.
Taping and mudding is an investment that pays dividends for years by achieving walls and ceilings that stand the test of time with invisible, crack-resistant seams.
Frequently Asked Questions
How much taping mud do I need for a project?
Estimate needing about 1 gallon of taping mud per 500 square feet of drywall. So, for a 2000 sq ft house, buy around 4 gallons to start. It’s better to have extra than run short. Factor ceiling height – taller walls need more mud per square foot.
How do I calculate how much drywall I need to buy?
Measure wall dimensions and ceiling height for total square footage. Subtract window and door areas. Divide total square footage by 32 or 48 to get the number of 4×8 or 4×12 sheets needed. Add 10-15% extra to allow for off-cuts. Consider renting rather than buying sheets for small DIY projects.
How many days does taping and mudding drywall take?
Allow 1-3 days for taping and initial quick mudding. Then 3-5 days for second coat. Another 2 days for third coat, plus 1 day sanding and cleanup. So approximately 7-10 days total depending on size of job and drying times between coats. Rushing leads to problems, so be patient.


Leave a Reply
Want to join the discussion?Feel free to contribute!